


Table of Contents Show
Knowing how to hook up your RV can be an intimidating process, especially if you’re new to RVing. With a little bit of practice and maybe even a checklist or two, you’ll feel like a pro in no time.
Today we want to help you feel a little more confident the next time you need to hook up your RV. Let’s dive in!
Supplies You Need to Hook Up Your RV
Whether you’re towing a massive fifth wheel or a tiny travel trailer, there’s a handful of items you’ll want to have on hand. These supplies will help make hooking up your RV a breeze.
RV Power Cord
Your RV will come with a power cord that will connect to a power source. Power cords typically come in a 25- or 30-foot length and vary in thickness depending on whether your RV is 30 or 50 amp.
Inspect your power cable visually for any damage before connecting to your RV. If there are any cuts or gashes in your power cord, you should immediately replace it.
Surge Protector
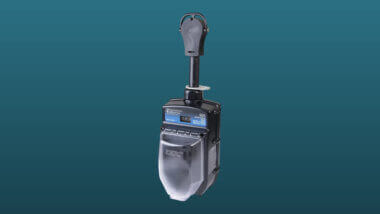
Surge protectors are commonly used to protect valuable electronics like TVs and refrigerators from lightning strikes, but they can also protect RVs. One lightning strike can do thousands of dollars in damage to your RV and electrical appliances.
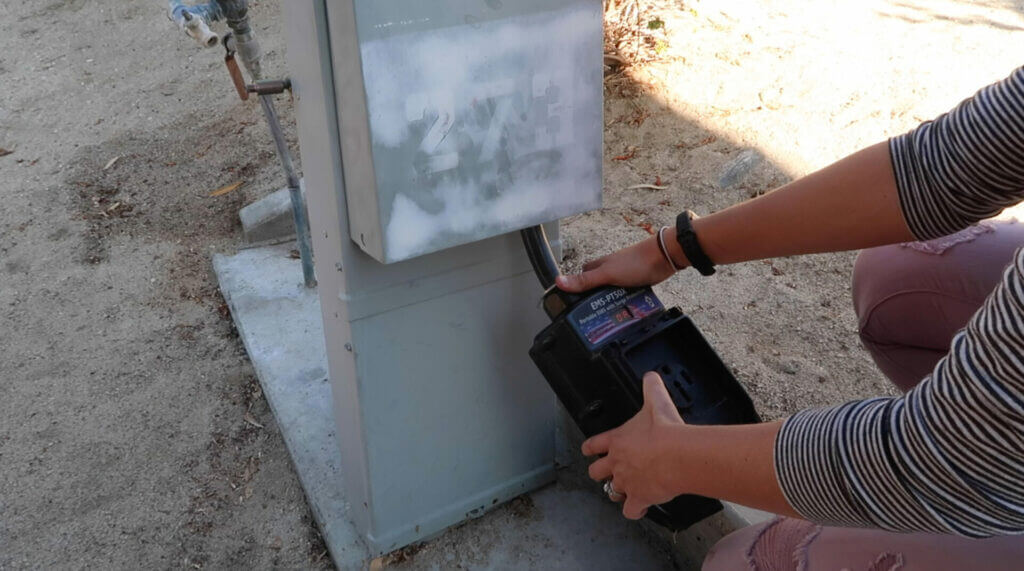
For optimal protection of your RV, we recommend getting an Electrical Management System or EMS. There are EMSes in 30 amp and 50 amp. Both monitor not only spikes in power but also drops in voltage, which can be equally damaging. An EMS will cut off a faulty connection to protect your RV. We consider this accessory a must have when you hook up your RV.
RV Dogbone Connector
An RV dogbone connector allows RVers to adapt their RV’s power cord to a power source. If you own a 50 amp RV, it’s always nice to have a 50 to 30 dogbone, or if you own a 30 amp RV, it’s a good idea to have a 30 to 50 dogbone. While these are not tools you’ll use at every campsite, you’ll appreciate having them when you do need them.
RV Sewer Hose and Attachments
Dumping your RV tanks may not be a fun job, but every RVer has to do it. Camco’s RhinoFLEX Kit includes everything you’ll need to quickly and easily dump your RV tanks. The kit comes with a 15-foot hose and multiple attachments. You’ll connect the sewer hose to either the sewer connection at your campsite or a dump station. You honestly couldn’t fully hook up your RV without one of these.
Sewer Hose Support
A sewer hose support is a collapsible structure that lifts the RV sewer hose off the ground and angles it for optimal flow. If you’re only dumping at dump stations, a sewer hose support may not be a purchase you need to make. However, many RV parks require a sewer hose support if you’ll be leaving your RV connected to the sewer connection.
Potable Water Hose
Whether you’re at a full hookup site or not, you’ll want to fill your RV’s fresh water tank. Be sure to purchase a water hose that is long enough to reach awkwardly placed water spigots when you hook up your RV. In general, 30 to 50 feet will suffice. Camco’s Premium 25-foot hose is a great option, and we love that it’s kink-resistant and BPA-free.
Inline Water Filter
An inline water filter helps not only create better smelling and tasting water but also protects your RV. Inline water filters protect RVs by blocking pieces of sediment from entering the water system. These deposits can damage water heaters, faucets, and water pumps.
Replace your filters seasonally if used occasionally and more frequently if you put them through heavier use. One of the most popular inline water filters on the market is Camco’s TastePure water filter designed for RVs.
Water Pressure Regulator
Water pressure regulators help regulate water pressure, which can vary widely from site to site. Most RV plumbing lines are rated for 40 to 60 PSI. Having a water pressure regulator helps protect your RV’s plumbing against higher pressure than that. An adjustable water pressure regulator like the Renator lets you adjust the pressure and use the regulator for purposes other than RVing.
How to Hook Up Your RV in 7 Steps
If you’re new to RVing, it can be intimidating getting set up at a campsite. We hope this quick step-by-step reference will help you!
1. Disconnect Any Towed Vehicles
If you’re not in a pull-through site and are towing a vehicle or boat behind your RV, you’ll want to disconnect it before you hook up your RV. It’s often incredibly difficult, or even impossible, to maneuver your RV into a campsite with a vehicle attached.
Practice hitching and unhitching your towed vehicle in advance so you can quickly and efficiently disconnect. Then park it out of the way.
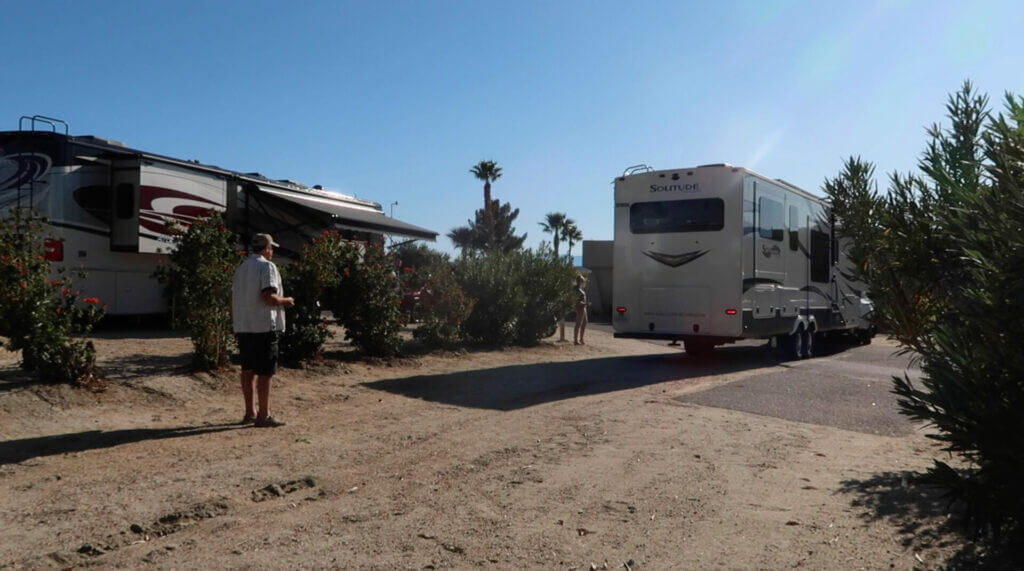
2. Park in Your Campsite
Parking your RV is a task that many new RVers, especially if you’re new to towing, dread at first. It does get easier with practice.
Remember to take your time, and that slow is good.
A spotter can help you avoid poles, trees, and other obstacles around the campsite. Do your best to center your RV.
Be mindful of the distances needed to open slides, connect to a power pedestal or water supply, and access storage bins.
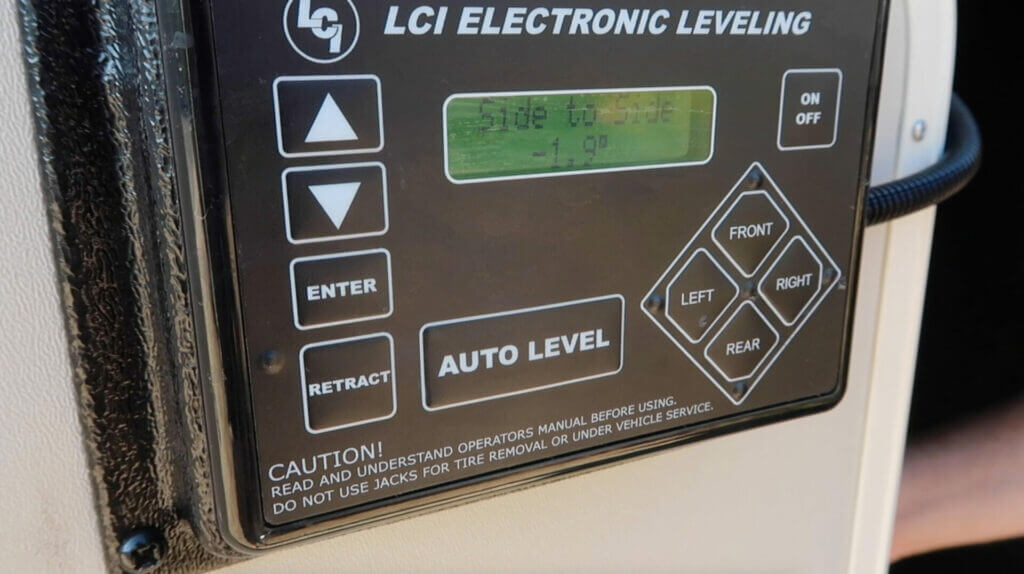
3. Get Your RV Level
Not only do you want your RV to be level for your comfort, but many propane appliances require being level to run efficiently.
Maneuvering your RV an inch or two from side to side can make a big difference. Even if your RV comes with an auto-leveling system, level your RV as much as possible on your own first.
LevelMatePRO is a great tool to assist with leveling your RV, but it’s an investment.
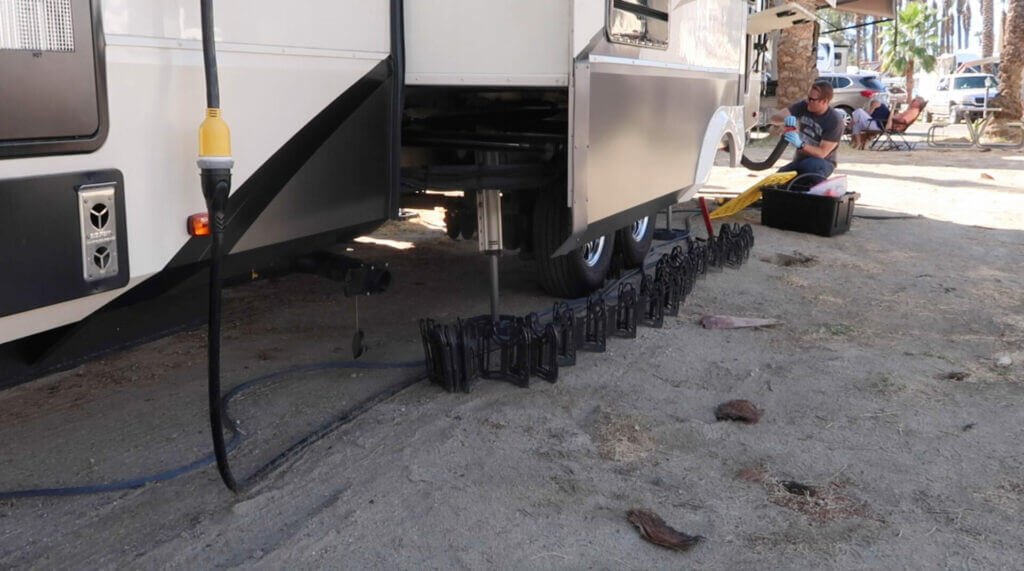
A cheaper alternative is to use a level and then drive on pieces of wood. Or you can use leveling blocks to raise the low side of your RV.
4. Hooking Your RV Up to Campground Power Pedestal
Be sure to confirm the breakers are off at the power pedestal before hooking up your RV. Connect your surge protector to the power pedestal and turn on the breaker. The reading will give you an indication of the health of the power pedestal before connecting your RV.
If the surge protector indicates it’s safe to connect your RV, turn off the breaker. Connect your power cable to the surge protector and proceed to connect to your RV. Confirm all connections are secure, and then turn on the breaker.
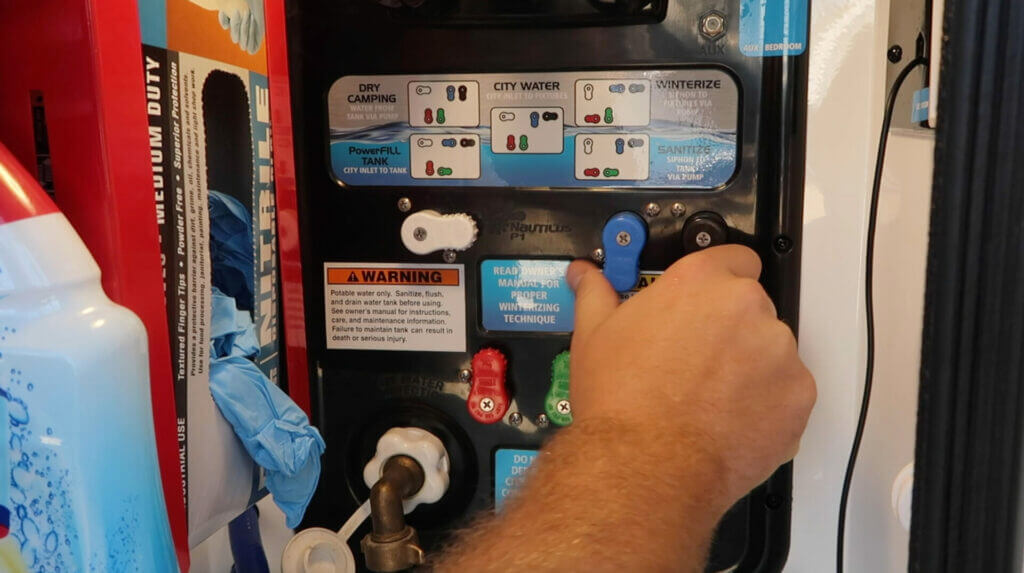
5. Hook Up to City Water for Your RV
If your site has a water connection, you’ll have no trouble showering, doing dishes, or having water for your toilets. Connect a water pressure regulator to the water spigot followed by your water hose. Depending on your RV, you’ll want to make sure that your nobs are turned to accept a city water connection.
You’ll also want to connect an inline water filter just before your RV’s fresh water connection. Some connections require elbows or extensions. Extra parts are readily available at most major big-box retailers that sell camping gear.
6. Hook Up to RV Sewer
An RV site with a sewer hookup makes emptying your RV’s tanks incredibly easy. Connect your RV’s sewer hose to your RV first. Then use the proper attachments to connect to the sewer drain. Using a sewer hose holder helps support the sewer hose, guides the hose at the appropriate angle, and keeps your sewer hose off the ground.
Double-check your connections, especially the link to the sewer drain. It only takes skipping a step once when connecting your RV sewer hose for you to learn the importance of a secure connection.
7. Turn on Propane System
Your propane system will use propane stored in a propane tank (or tanks) for heating water, powering stove burners, and possibly even running your refrigerator. Consult your RV’s user guide to learn how to use your propane system properly.
Pro Tips for Using Full Hookups at a Campground
The more you RV, the more you’ll discover tips for improving your camping experience and maintaining your RV. Here are a few tips we want to make sure you know!
Never Leave Black Tank Open
While it may initially seem like a great idea to leave your black tank open when connected to a sewer drain, it’s not. Black tanks function well because there’s a balance between solids and liquids.
Leaving your black tank open causes all of the liquids to drain, leaving only solids. Without liquids, the solids build up into a pile, often referred to as a “poo pyramid.” It can harden, produce odor, and cause more backups.
Keeping your black tank closed allows for a good ratio of liquids and solids. When you have a good balance in your black tank, the suction created while dumping will help flush out the solids.
Be sure to empty your tank after every trip and flush regularly.
Always Use Water Pressure Regulator and Filter
Water pressure regulators and water filters are two cheap accessories that will protect your RV. A water pressure regulator protects your RV’s water system from being exposed to too much pressure. These water lines are susceptible to leaks and burst pipes when over pressured.
A water filter does more than just help with the taste and smell of water. Sediment can enter through the water spigot, but a water filter helps protect your RV from this. These are essential when hooking up your RV.
Use a Lock for Your Surge Protector
RV surge protectors aren’t cheap, especially if you get one with an Electrical Management System or EMS.
These can be several hundred dollars and are often out of your line of sight while camping. You’ll be left unprotected and out a considerable amount of money if you don’t lock up your surge protector.
Don’t Connect to Power if Pedestal or Outlets Look Damaged
While many campgrounds pride themselves on maintaining their grounds, not all do. If your power pedestal or the outlets look damaged in any way, don’t hook up your RV.
A pedestal may appear to be in working order, but a surge protector or Electrical Management System could reveal flaws.
Learning how to hook up your RV becomes a little bit easier every time you do it. After a few rounds, you’ll be a pro at getting set up. What’s your best tip for learning how to hook up your RV?