


Table of Contents Show
Are your RV waste tanks full, but you have no idea how to use an RV dump station? Well, you’re in luck! This article is a step-by-step guide to learning how to use an RV dump station, what equipment you need, and even some good ol’ RV etiquette.
Let’s go!
Learning How to Use an RV Dump Station Is Simple
When you first start RVing, everything can seem overwhelming. It’s like a different world!
Luckily, learning how to use an RV dump station is pretty simple. There are many different parts, but once you get the hang of it, it’s second nature.
Just remember that you’re dealing with raw sewage. Take the proper precautions to protect yourself and keep things sanitary for the next RVer!
First: What Is An RV Dump Station?
An RV dump station is a pull-up area RVers can dump their tanks. You can dump gray and black water at an RV dump station, wash your tanks, and be on your way.
RV dump stations typically always have a sewer hookup for dumping wastewater and a water spigot for cleanup purposes.
Some campgrounds without full hook-up sites have dump stations. You can also find them at any RV park and dealership, and even some gas stations and rest stops.
Finding dump stations along your travel route is easy with an Allstays app called RV Dumps.

What You Need to Use the RV Dump Station
There are a few critical pieces of equipment you’ll need. If this is a new or new-to-you RV, the dealership may have given you a “starter pack” that includes most of these items.
However, for first-time dump station users, we recommend upgrading to the equipment listed below. Proper RV sewer hookup equipment can make a gross job, not exactly pleasant, but at least less gross! If you’re looking for our full list of accessories, check out 20 RV Sewer Accessories that Don’t Stink!
Sewer Hose and Proper Connections

- Hose will not dent or rust and will not crush if accidentally stepped on
- Offers superior abrasion resistance for maximum protection against pinholes and leaks
Sewer hoses come in various styles, but we recommend the Rhino Extreme Sewer Hose Kit. It’s the best value material and a good length.
You’ll also need additional attachments for fitting your sewer hose to your RV and into the dump station sewer hookup. Retailers sell kits with all the necessary attachments, but if it comes without a clear elbow, pick one of those up too! A clear sewer hose attachment makes it possible to see when your tank is clean, literally.

- Effortless Tank Cleaning: Keep your RV black tank, camper sewer hose, and tote tank clean with the Rhino Blaster RV...
- Visible Results: With its clear 45° elbow, this RV tank cleaner allows and real-time monitoring of your tank's cleaning...
If you don’t already have a clear elbow attachment, we recommend the one above. You can hook up your water hose and flush your black tank right from your sewer hose with this attachment.
Gloves
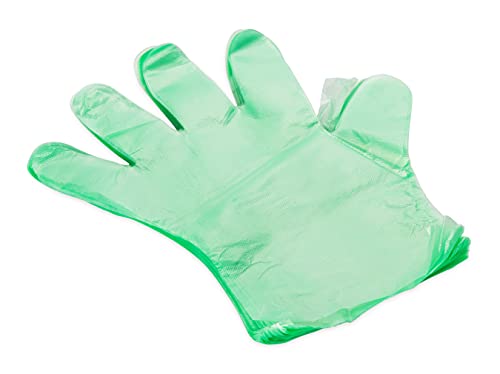
- Protect Your Hands: These gloves protect your hands from any dirty job and are ideal in dry and wet conditions
- Sizing: One size fits all
Always wear gloves when using an RV dump station. This is raw sewage we’re talking about, after all. And you never know how sanitary the person was who dumped their RV before you!
If you prefer to wear reusable gloves, sanitize them between each use.
Non-Potable Water Hose for Cleaning

- Premium Grade Drinking Water Hose: Camco's premium-grade RV fresh water hose is constructed with NSF/ANSI 61 certified...
- Certified Lead-Free: Enjoy Camco's CSA lead-free certified RV hose! It meets the highest standards, is CSA lead-free...
You’ll need a hose for cleanup at the RV dump station. Never use your drinking water hose for this! The risk of contamination is high, and using your fresh water hose for dumping could make you incredibly sick.
RVers should always carry two hoses: one for utility and cleaning purposes and one for drinking water. The hose above stores away easily and is very affordable.
Disinfectant Wipes or Spray and Paper Towels
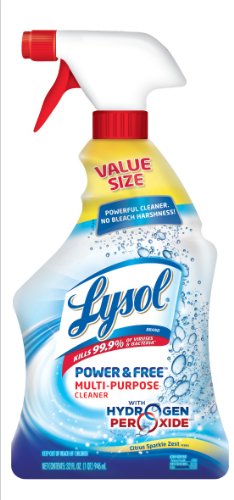
- 32 Ounce
- Kills 99.9% of Viruses & Bacteria when used as directed
Have disinfectant wipes or spray and paper towels handy. After you use the RV dump station, sanitize everything you touch!
This includes gate valve handles, the RV storage bay door handle, your hose, and even the dump station water spigot. We keep a bottle of Lysol Multi-Purpose Cleaner in our storage bay at all times for when we use dump stations, and to sanitize the freshwater spigot at every campground we set up in.
Should You Dump Your Tanks in a Certain Order?
Yes, you should always dump your RV waste tanks in a specific order, starting with the black tank and then the gray tank. Doing so allows you to use gray water to clean out black water residue in the sewer hose.
Depending on the size of your RV, you may even have multiple gray tanks. We have two gray tanks, one for our kitchen and one for our shower. We dump our black tank, kitchen gray, then shower gray as it’s the dirtiest to “cleanest” water.
How To Use an RV Dump Station
Using an RV dump station is relatively simple. We’ll walk you through the process from start to finish in the steps below.
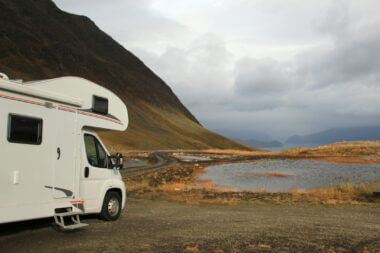
Pull Up and Line Up Your RV With the Dump Station
Start by line your RV up with the dump station. The length of your sewer hose will determine who close you need to be but don’t get so close that you can’t open the necessary equipment bins or access the sewer hookup area.

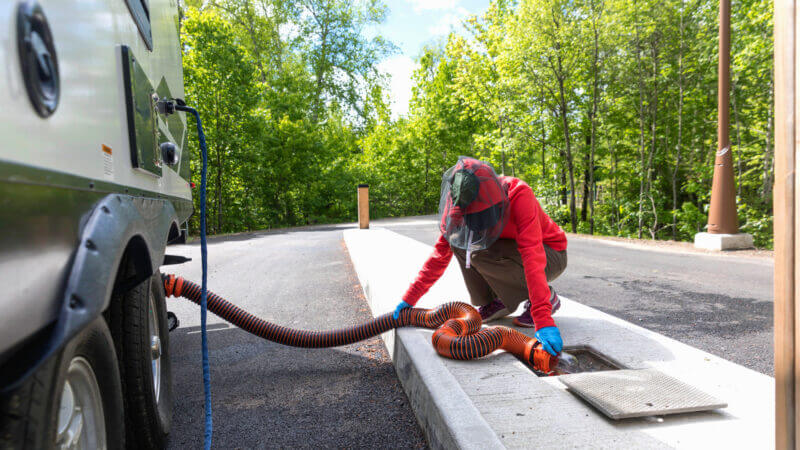
Put on Gloves and Attach Your Sewer Hose with Clear Elbow to Your RV
Always wear gloves at an RV dump station! Assemble your sewer hose with the proper attachments for your RV and the sewer drain.
Before hooking the sewer hose up to your RV, ensure the rubber O-ring is in place inside the attachment. If that O-ring falls out or goes missing, you’ll have a stinky, leaky mess on your hands.
Secure the End of the Sewer Hose in the Dump Station Drain
Some RV dump stations can secure your RV sewer hose in the drain with an attachment, but not so with others. You’ll have to figure out a way to keep the hose in the hole when the flowing pressure wants to force it out.
At some dump stations, you’ll notice a large rock or cement block in the dump area. RVers will place this rock or block on top of the sewer hose to prevent it from popping out. If nothing else, have someone use their foot to hold the sewer hose in place.
Once black or gray water starts flowing through the hose, it can get wild fast! If it’s not tight or firmly secured into the sewer drain, you’ll have sewage flying everywhere! Think of the cartoon fire hoses that no one can seem to hold onto, it’s exactly like that.
Make Sure All Attachments Are Secure
We stated it before, but we’ll repeat it: make sure your attachments are secure. Give part of the hose connecting to the RV a tug, so you know it’s tight. If it’s not on correctly, it will pop right off when you pull the valve. Again, double-check the O-ring and the drain connection are secure and tight.

Pull Black Tank Valve to Dump Black Water
Now that your hose is hooked up and secure, it’s time to pull the valve. Before pulling the black tank valve, we always quickly open our shower gray tank valve (for about five seconds). Opening it for a few seconds allows us to ensure our connections are secure and there are no leaks. Trust me, if you have a leak, you’d much rather want to learn about it with your shower waste instead of your black tank waste!
Once you have confirmed there are no leaks, open the black tank valve and allow the tank to drain completely into the RV dump station.
If Desired, Flush Black Tank and Dump Again
Once you dump your black tank, you may want to flush it a time or two to remove residual debris. Flushing simply means filling the black tank with fresh water and dumping it again.
Some RVs have a black tank flush system, or you can flush it using a special attachment. Otherwise, you can run a hose through the window into the toilet.
Next, Pull Gray Tank Valve
After you’ve dumped and flushed your black tank, you’ll do the same thing with your gray tank. Pull the valve and let ‘er rip!
Rinse Gray Tank If Desired
You can also flush the gray tank if desired. Gray tanks don’t hold solids like the black tank does, but soap scum and food debris can cake onto the sidewalls. If it’s not cleaned properly, it’ll start to smell.
When first learning how to use an RV dump station, try to keep in mind how long you’re taking when rinsing your tanks. Personally, we will skip a second rinse on our black tank and not rinse our gray tanks if there is a line. We can save the deep cleaning for when we have full hookups at an RV park.
Close Valves and Disconnect Sewer Hose from RV
After both tanks are empty and flushed, close both valves and replace the cap, if applicable. Double-check that they’re securely in place to avoid problems later on!
At this point, you want to leave the end of the sewer hose in the drain but disconnect it from the RV.

Use Water Hose to Rinse Inside of Sewer Hose and Any Spills
There’s always the chance of residue or debris left inside the sewer hose after a dump. Use your utility water hose to rinse out the inside of your sewer one and spray away spills.
Put Everything Away
Keep your sewer hose and attachments away from other items that you store in your RV. Some RVs have a special place to store your sewer hose; others do not. If you don’t have a designated sewer hose spot, we recommend using storage crates to keep it separate. Doing so is crucial for preventing contamination.
Sanitize Valves and Sanitation Station on RV
Lastly, it’s time to sanitize. Once you’ve put everything away, get your disinfectant wipes or spray and clean up! Wipe down your valves, utility hose, storage bay handles, and the water spigot knob at the dump station.
That’s it! You now know how to use an RV dump station.
Plan Carefully and Dump Responsibly
The process of dumping your RV at a dump station is pretty simple, but it takes a good chunk of time—schedule dump time into your trips.
Always be mindful of other RVers. If there’s a long line waiting to use the dump station behind you, consider emptying there and flushing out your tanks at the next stop or the next time you dump instead.
Clean up after yourself and keep in mind: mistakes happen! Almost every RVer has a dump station horror story. Hopefully, this article will keep you from being the next one.
Last update on 2025-07-05 / Affiliate links / Images from Amazon Product Advertising API

As a soon to be newbie, I appreciate the tip, start with the shower grey tank to look for leaks.