


Table of Contents Show
When you own an RV, you’ve got to figure out how to keep lots of different things in working order. That includes the toilet, which we all know is one of the most important things on board. RV toilet repair isn’t as difficult as you may think.
Just like they do in your bathroom at home, there are situations that come up that require your attention – sometimes immediately! To avoid those kinds of sudden surprises, it’s a good idea to perform regular preventative maintenance. An important first step with RV toilet repair means understanding the different components and how they all work.
Primary RV Toilet Parts
Your RV toilet isn’t exactly like the one at home. They are designed to use as little water as possible. Additionally, unlike a traditional toilet, there is no storage tank to hold water for flushing. The water trickles in from your holding tank and empties directly into your black tank.
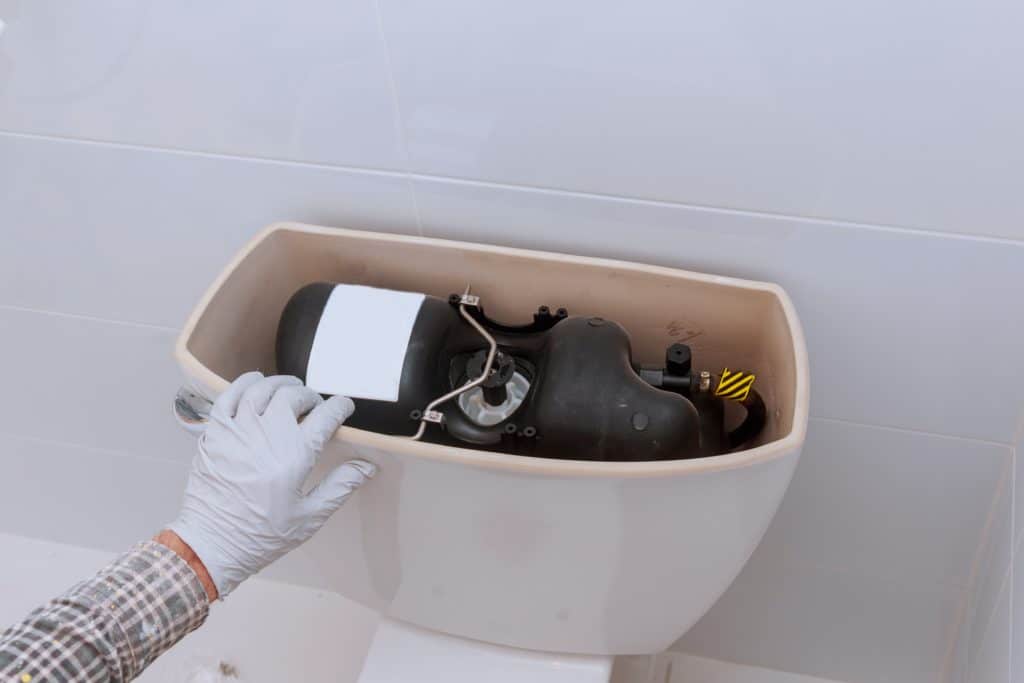
The toilet itself is made up of just a few main parts. These parts need to be functioning properly to avoid any kind of breakdown. The primary components are the water valve, spring cartridge, vacuum breaker, bowl, base, and seals.
How RV Toilet Repair Should Be Approached
To paraphrase an old friend who is an expert in appliance repair, the first question to ask is, “What’s it doing, or not doing?” This is known as troubleshooting, in which you pinpoint the problem by ruling out other possibilities. Common issues are leaks and clogs, but these aren’t the only toilet troubles that can cause you to worry.
Obviously, the best time to take on RV toilet repairs is in the off-season, when you are not using your rig. But whenever it is that you start to work on the problem, be sure and disconnect the water connection and drain the tank to avoid any flooding issues.
If you don’t feel like dealing with the issues yourself, you could always see if it is covered by your manufacturer warranty. If that has expired, we highly recommend Wholesale Warranties. You can get a free quote to see if an extended warranty is something you’d want to invest in!
Leaky Toilet Checks and Repair
If you’ve got a leak, you need to zone in on where it’s happening. Once you do this, you can figure out which part needs to be fixed or replaced. If there’s a drip from the upper part of the toilet during the flush cycle, it could mean that the rubber seal in the vacuum breaker is cracked or worn. You can try lubricating it with petroleum jelly, but it may just need to be replaced.
If the leak occurs when the bowl is full of water, the bowl itself could be cracked. This is more common with plastic toilets rather than porcelain ones. You might be able to mend the crack, but a replacement probably won’t break the bank.
If you see water collecting around the base of the toilet, you need to identify the source immediately. The water could be coming from the bottom itself, and that means there is a good chance that the flange seal around the base needs to be replaced. If it’s black water, that means it’s seeping back in from the black tank. Chances are you’ve already detected that with one of your other senses!
Preventative Maintenance
The best way to avoid RV toilet repair is to use preventative maintenance. As we mentioned before, sometimes a seal can crack and cause a leak, and sometimes they start gradually and get worse over time. A good way to prevent this from happening, or at least to prolong the life of the seal, is to rub the seal with a toilet seal lubricant to keep it moist.
Other ways to keep your RV toilet running smoothly are to make sure you use proper, fast-dissolving RV toilet paper. Additionally, always use enough water for flushing – but not so much that you’re being wasteful.
It’s also a good idea not to use bleach to clean the plumbing system because they can damage the seals. Not to mention, bleach and urine create a toxic gas that can be deadly! There are lots of alternative cleaners on the market that are environmentally safer to use and won’t cause damage.
Pro Tip: You don’t need to use expensive RV toilet paper. Check out these RV Toilet Paper Alternatives You’ll Wish You Used Sooner.

RV Toilet Replacement
Some RV toilet repairs are easy ones, but sometimes there’s nothing you can do but replace the whole thing. Before you can do that, though, you have to make a few determinations. While trailers and campers are pretty simple and straightforward for the most part, things can get more complicated with motorhomes. Most installations are easy, but here are some common questions you’ll need to answer so you’ll know how much labor or costs will be involved:
Are you using a tried-and-true gravity flush toilet, or is yours a macerating toilet that grinds the sewage and pumps it out? Is the bowl plastic, or is it made of porcelain? Finally, what size is the waste hole? If you want to brush up on your toilets, read our article on the Best RV Toilet to Make Your Camping Experience More Comfortable.
If you’re ready to replace your RV toilet, this is a great how-to video:
Final Thoughts
RV toilet repairs aren’t difficult once you get the hang of them. They require some common sense and an understanding of how the various parts work. Luckily, the RV community is generally very happy to share the know-how we’ve accumulated so that others can keep things running smoothly and avoid the costly (and sometimes smelly!) mistakes we’ve made along the way.