


Table of Contents Show
We confused many people when we sold our fifth wheel and purchased a used, old truck camper.
However, we had big plans to take a dated truck camper and turn it into a dazzling home on wheels. Our RV bathroom remodel was one of our first projects in our new-to-us rig.
Unfortunately, we quickly realized it wouldn’t be nearly as cheap or easy as we had initially thought. Today, we’re walking through the remodeling process for the bathroom in our RV.
Let’s get started!
How Do You Update an RV Bathroom?
If you’re tired of having a cookie-cutter RV bathroom, giving it an update can give it some character. A fresh coat of paint or a layer of wallpaper can radically transform the space.
Additionally, replacing lighting, faucets, and fixtures is relatively easy and can have a huge impact. These are all projects that just about anyone can tackle in a couple of hours.
You can replace countertops, flooring, or your shower to take it a step further. Depending on your choice, you can make a space look or feel larger.
And some upgrades make it easier to keep your bathroom clean or organized!

Keep in Mind: Looking for more convent ways to store your toiletries in your bathroom? Try these RV Bathroom Storage Ideas to make your life easier
What Is a Realistic Budget for an RV Bathroom Remodel?
The cost of an RV bathroom remodel will greatly depend on the complexity of your renovation. A typical RV bathroom renovation could cost anywhere from $75 to $250.
However, if you want to take your renovation to the next level and do a complete gutting, you could look at spending over $1,000.
We couldn’t find much information when it came to what others spent on their bathroom renovation, so we knew we wanted to share our numbers with others before they dive into their own projects.
We spent just over $1,600 on our RV bathroom remodel. Believe it or not, it was easily the most expensive part of our entire truck camper renovation.
Before starting any remodeling project, you need to set a budget. If not, you could quickly spend substantially more than you anticipated.
Also, keep a detailed log of your expenditures to stay on budget. Luckily, we came into this project with a good guess of what it would take and weren’t surprised by most of the costs.

How We Remodeled Our RV Bathroom
We’ve posted a few pictures and videos from remodeling our RV bathroom. As a result, we’ve received a lot of questions about what we did and the products we used.
To make it easy, we’ve detailed how we remodeled our RV bathroom. Let’s take a look!
Demolition Day
Demolition day was fun, exciting, and terrifying all at the same time. We completely gutted the entire bathroom in our rig. While we were excited about the possibilities of what the space would become, we knew we couldn’t turn back at this point.
It’s important to be extremely careful during the demolition. You don’t want to cause unnecessary damage to walls, flooring, or cabinetry that will create more work for you.
Take your time and ensure you remove every screw that’s holding an item in place.

Custom Shower and Waterproofing
Once we removed the shower, we installed a foam board shower pan custom-made for our space. While it may not have been the cheapest option, it was worth paying a few extra bucks to ensure we got the perfect fit.
The pan has a 2% slope that helps ensure water gets into the drain as efficiently as possible.
Next, we installed GoBoards, which we purchased locally from Lowe’s. This helps waterproof the shower walls and avoid any potential damage down the road.
This lightweight material is a fantastic substitute for cement boards, which weigh much more. Since we were keeping the weight of our RV in mind, we looked to save weight anywhere we could.
Once we installed the GoBoards, we taped the seams with a waterproof membrane to prevent moisture from getting between them.
We purchased 75 feet of XFasten from Amazon, which was more than enough for this project. It was cheap and easy to install (two of our favorite things).

- MULTI-USE. The XFasten Basement wall moisture barrier can be used as a waterproofing material for decks, underlayment...
- HIGH COMPATIBILITY. Confused as to what liquid waterproofing membrane to use? Our basement wall moisture barrier is...
After the waterproof membrane had time to cure, we applied two coats of RedGard. A single gallon sufficed for our shower project.

Placed Ceramic Tile
Once the RedGard had time to dry, we started the water-testing process. This was rather simple as all we had to do was plug the drain and fill the shower pan to the brim.
We marked where the water line was and came back 24 hours later to check on it. Unfortunately, we had a small leak. We added a third coat of Red Guard and repeated the water testing process.
Thankfully, the second time around, there were no water leaks!
Once we knew we were in the clear, we started to add the tile. We chose a ceramic penny tile for the shower pan and a faux marble tile for the walls (more on the wall tile later).

Painted Everything
Next, we gave the shower some time to settle and moved on to paint just about every remaining inch of the bathroom.
We put Benjamin Moore Stix Waterborne Bonding Primer on as the first layer; then we came back to paint the walls with a Dove White color.
For the cupboard, we took a gamble and painted it black. We hoped to create some contrast between the walls and the cabinet.
While we were nervous about how it might turn out, we love the results of our RV bathroom remodel.

Pro Tip: We specifically chose an RV with a dry bath when downsizing. Read our 5 Reasons to Avoid an RV Wet Bath!
Installed Shower Wall Tiles
Unfortunately, this step in the renovation was rather expensive. The total shower renovations make up approximately two-thirds of the overall cost of the bathroom budget.
However, other options weren’t significantly cheaper. We originally tried to find a pre-molded shower wall and pan (like the one we took out) but those came in at around the same price as the tiles.
At the end of the day, we opted for the faux marble tile. It provides the residential look and feel that we were going for.
So yes, we spent a few extra hundred dollars, but we now have a more functional and higher-quality shower. This is the one project we do not want a re-do of in the future!
Installing the individual tiles was more time-consuming than a molded shower insert. However, we were blown away by the final results and knew we had made the right decision.

- Elegant do-it-yourself tiles; These vinyl wall tiles by Palisade are easy to install and look quite elegant with a...
- Cover large areas; Tiles measure 23.2 inch x 11.1 inch x 5 millimeter making it easy to cover large areas in a short...

Upgraded Shower Faucet
Just about everyone has one item they splurge on when doing a renovation. For us, we chose to upgrade the shower faucet. We splurged on a Delta faucet to make our navy showers more comfortable.

- ROUGH SOLD SEPARATELY: Shower valve trim kit only, purchase Delta's MultiChoice Universal Shower Valve separately to...
- DUAL-FUNCTION HANDLE: The dual-function shower handle allows you to adjust the water temperature and volume separately...
Was it the cheapest option? Absolutely not. However, it’s a substantial upgrade that we think is worth it.
One of the main benefits of the Delta faucet is that the water temperature stays the same when you turn it on and off. This will help us enjoy showers more and avoid wasting water.
Since we have some epic plans to boondock in the future, we don’t want to waste even a drop.

Installed Waterproof Flooring and Low-Profile Toilet
We then moved on and installed SmartCore waterproof LVP flooring. We chose this flooring because it’s easy to install and maintain.
It can withstand exposure to moisture and has an attached pad on the back to reduce noise and increase comfort. It was exactly what we were looking for in our RV bathroom remodel.
Once the floors were wrapped up, we installed the Thetford Aqua Magic V low-profile toilet. It’s a toilet designed for RVs, nothing fancy.

- [VERSATILITY]: Aqua-Magic V is the RV toilet with a classic style, suited for all recreational vehicles
- [FUNCTIONALITY]: The toilet has a single-pedal flush system - press it halfway to add water to the bowl and all the way...
We didn’t have many options anyway, as we needed a low-profile toilet with a 10-inch rough-in. However, it does the job and was incredibly easy to install.

Pro Tip: Read 5 Mistakes People Make When Showering in an RV to ensure you’re not causing future damage to your rig!
Butcher Block Countertops
We used a sealed butcher block we purchased from Home Depot for the countertops. Seriously, we couldn’t be happier with how it turned out, and we love the statement it makes when you first open the door to the bathroom.
It adds to the home-like feel that we were trying to create.
Additionally, we had enough left over to use elsewhere in our truck camper. We’ll share more about that project with you in the future. Spoiler alert, the results were better than we expected!
Sink Bowl with Tall Faucet
One of the final projects in our RV bathroom remodel was to find a sink and faucet that complemented the rest of the space.
We’ve always loved the look of bowl sinks and farmhouse-style faucets in bathrooms and were excited to find some that worked in our small space.
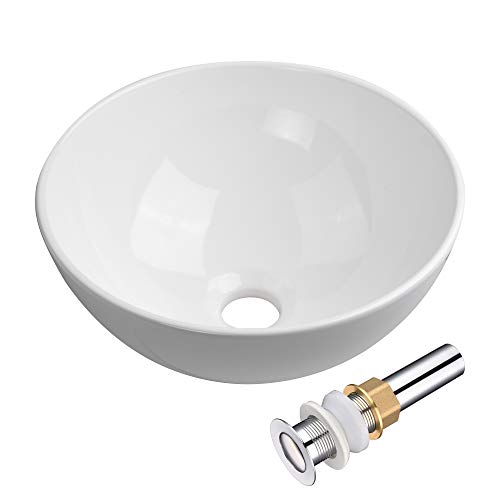
- [Simple & Space-saving]: This Aquaterior 12" Round Bathroom Sink comes in a modern and simple design with white color, a...
- [Durable]: Crafted from high-grade ceramic for great durability, it features smooth, rounded edges and contoured lines...

- Elegant Design: The BWE Vessel Sink Faucet has a modern and elegant design that will add a touch of sophistication to...
- High Quality solid brass bathroom faucet heavy duty material construction for reliable and durable.The cartridge adopts...
Once everything arrived, we quickly got to installing them. Cutting holes into our brand-new butcher block countertops was terrifying, but it turned out great.
We thoroughly tested all the water connections to ensure everything worked flawlessly.

The Finishing Touches
Once we reached the point of adding the finishing touches to our RV bathroom remodel, we started to exhale.
We could see the light at the end of the tunnel, and all of the big decisions and projects were behind us. If you’ve ever done a major remodel, you know how great this can feel.
For the finishing touches in our bathroom, we chose a small curved shower rod. This gave us a few extra inches when showering.
If you’ve showered in a tight space, you know a few extra inches can be tremendously beneficial.

- Attention Need to Drill Holes in Wall ! You could refer to the installation video on the page, please use 5/16 inch...
- 【Stronger Than Tension Shower Rods】0.9MM thickness thickened pipe of this brushed nickle finished curved shower...
Additionally, we opted for a soap dispenser that hangs on the wall to avoid having toiletries in the shower since it’s such a small space.

- This Pack Includes: Three (3) extra-thick PET plastic amber bottles shower soap dispenser which can hold 16.9 fl...
- Quality Materials: Designed in the U.S.A and made with ISO14001 environmental standard, the set features fortified 55g...

We finished off the shower with a shower curtain from Target. Again, nothing fancy, but it gets the job done and matches nicely with the colors of the paint on the wall and cupboard.
Keep in Mind: Before you start your bathroom remodel, read these Tips for Replacing Your RV Bathroom Faucet!
Bring New Life to Your Dated RV Bathroom
Now that our RV bathroom remodel is complete, we love it. Did we question ourselves and our sanity multiple times during the process? Absolutely.
However, we’ve brought new life back into our truck camper and will enjoy the fruits of our labor every time we take it on an adventure.
If you’re unhappy with the look and feel of your RV’s bathroom, do something about it. Come up with a plan and take it one step at a time!
Last update on 2025-07-11 / Affiliate links / Images from Amazon Product Advertising API

Looks amazing, I hope you have better luck with that type of faucet than we did. Whenever we would switch from dry camping to city water there would be air in the lines and when you turned that one on it would shoot across the room. Another issue is calcium buildup and at least on the one we had there was no way to clean it.
Looks real nice. Can’t wait to see the rest of the rig.