


Table of Contents Show
You don’t have to spend a tremendous amount of time and money upgrading your RV’s bathroom.
Upgrading your RV bathroom faucet can improve not only the aesthetics of your bathroom but also the functionality.
However, there are some things you need to keep in mind when replacing or upgrading your faucet.
Today, we’ll share some tips for replacing your RV bathroom faucet and walk you through the process. Let’s get started!
Are RV Faucets the Same as Home Faucets?
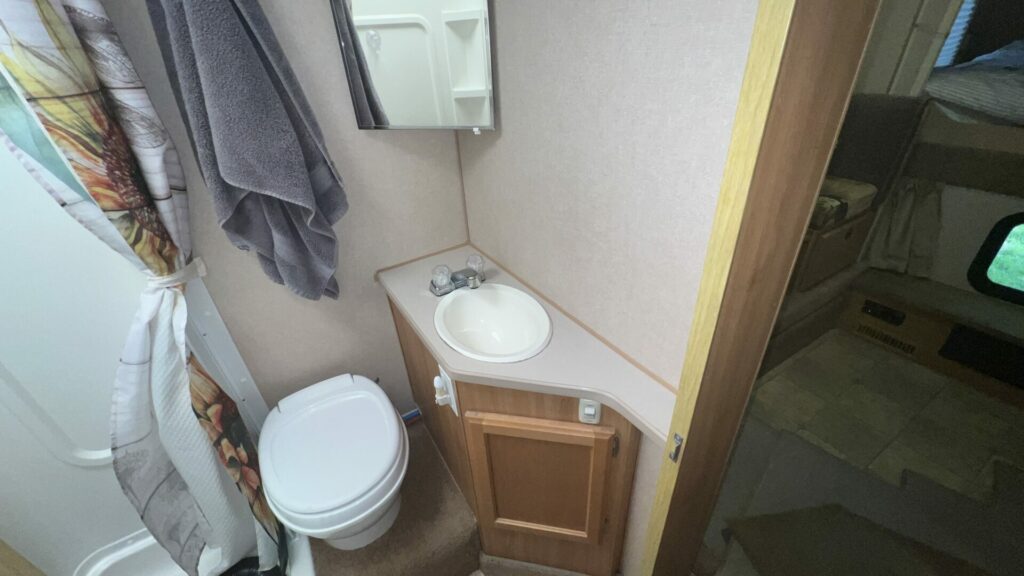
RV faucets function the same as home faucets.
However, RV manufacturers typically use plastic faucets instead of metal.
This saves on adding weight and cost to the final product.
As you might expect, a plastic faucet is a cheap alternative to a metal faucet.
These faucets tend to not last nearly as long as their metal counterparts.
The plastic parts weaken as they age and can crack or break easily, especially when exposed to extreme changes in temperature.
Can You Use a Regular Bathroom Faucet in an RV?
You can use a regular bathroom faucet in an RV, but some may require extra work.
Depending on the faucet, you may need to use a faucet adapter to connect the threads of the new faucet to water lines on your RV’s plumbing system.
However, if your water line connections match the new faucet, you can swap out your faucet in a matter of minutes.
Tips and How to Replace Your RV Bathroom Faucet
Now let’s walk through how to replace your RV bathroom faucet and a few things you should remember.
While this is a quick and easy DIY project that just about anyone can do, it’s not a race, and there’s no award at the end for doing it as fast as possible.
Take your time and make sure you do it right. Let’s get started!
Make Sure New Faucet Is Compatible
From the start, ensure your new faucet is compatible with your RV bathroom’s setup.
Switching from a two-handle faucet to a faucet with one handle means extra holes.
Some faucets come with a cover plate to help hide the extra holes, but that’s not always the case.
Make sure you check the label or product description when doing your shopping.
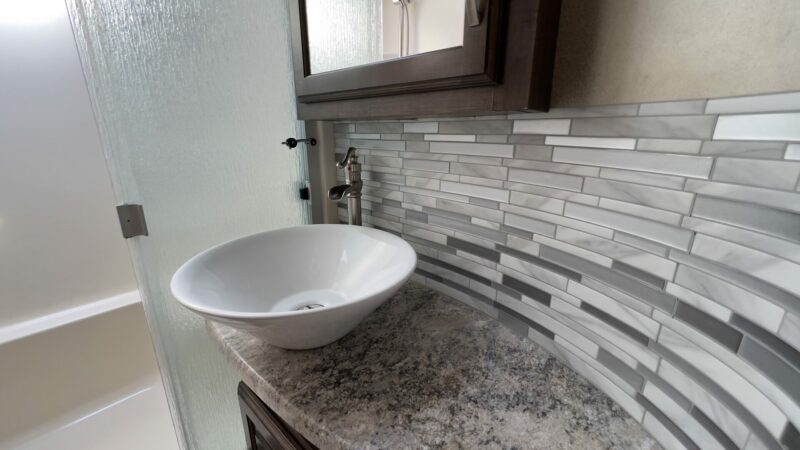
Many RVers choose to upgrade their bathroom faucet to increase space for hand washing.
Some standard RV bathroom faucets have minimal room between the bottom of the faucet and the sink.
However, if you’re installing a taller faucet, double-check the height and look for any potential clearance issues with your RV’s design.
Gather Supplies (and Double-Check Connection Sizes)
Double-check your connection sizes before ordering or purchasing any parts.
You can then begin gathering the necessary tools. This job should only require a handful of tools like an adjustable wrench, channel locks, and a headlamp.
However, having a bucket to catch water in the lines and some towels to clean up any stray water drops is a good idea too.
Turn Off Water Pump and Release Pressure in Lines
When you’re ready to start your project, make sure you’ve shut off the water source.
If you’ve been using the city water connection, shut off the water spigot.
If you’re using the water pump, turn it off.
Then walk around your RV, opening every faucet, flushing every toilet, and not forgetting outdoor showers and sinks.
This releases the pressure in the water lines and helps avoid making a mess during the next step.
Loosen Water Lines and Gaskets
Have a towel and bucket handy when loosening the water lines and gaskets.
There’s a chance that some water will remain in the water lines. You don’t want to cause a mess under your sink.
Once you’ve disconnected the water lines and unscrewed the gaskets, you can completely remove the old RV bathroom faucet.
Set New Faucet in Place
Before setting your new faucet in place, make sure you clean the surface.
This is a good opportunity to get any gunk or debris that’s worked its way under the faucet.
Apply Teflon tape to the threads on the new faucet to help create a tight seal once you connect the water lines.
You can now set the new faucet where the old faucet once sat.
Center the new sink faucet and ensure it lines up with the drain.
Tighten Gasket and Attach Water Lines
Tighten the nuts that came with the faucet to hold it in place and confirm that the faucet is centered on the sink basin.
Tightening nuts on the faucet helps ensure it stays in place and doesn’t move around when you’re using it or while your RV travels down the road.
Now connect the appropriate water lines to the threads on the water faucet.
The red water line is for the hot water, and the blue is for the cold water.
Reversing these will surprise anyone who goes to wash their hands in your bathroom.
Use an adjustable wrench to make sure the water line connections are snug.
However, as these will likely be plastic pieces, you want to avoid over-tightening them, which can easily damage the plastic pieces.
Pressurize System and Check for Leaks
With everything reconnected, you can now pressurize the water system and look for leaks.
This is best done with the help of another person so you can turn the water off as quickly as possible if you spring a leak.
If you discover a leak, release the pressure from the water lines before disconnecting any of the lines.
Best RV Bathroom Faucet Replacements
Now that you’re ready to replace your RV bathroom faucet, here are some of the best options to consider.
There are various options, whether you want to improve functionality or create a more modern look.
Keep in Mind: Poo in Privacy while camping with these Portable Toilets for Camping!
Best Budget Option: RecPro 4″ RV Faucet

- Installation is quick, and the faucet is easy to use, with each of the handles being labeled for hot or cold; With the...
- A simple twist is all it takes to get temperature-controlled water from your freshwater tanks; This faucet is designed...
If your RV faucet has broken or needs replacing, this RecPro RV faucet will do the job.
This faucet is made from lightweight, durable plastic. At 11.2 ounces, you avoid adding any additional weight to your RV.
The smoke-colored knobs have hot and cold labels, so you know exactly what to expect when you turn them on.
It may not be fancy or modern, but it’s the best budget option for replacing your RV faucet.
Best Two-Handle Option: RV Bathroom Sink Faucet

- [CLASSIC DESIGN] - This RV faucet has classic Two-Handle lever operations to quickly adjust temperature and water...
- [QUALITY] - This RV bathroom faucet adopts ABS and copper material, oil rubbed bronze finish, resists tarnishing and...
If you’re looking for a two-handle faucet, this faucet from OYMOV is compatible with most RVs, boats, and motorhomes.
The faucet has a tarnish- and corrosion-resistant bronze finish.
Whether you’re taking your RV on weekends or on full-time adventures, this faucet will last for years to come.
It’s made from copper instead of plastic, so it feels much sturdier than plastic faucets.
Best One-Handle Option: Bathroom Sink Faucet With Drain Stopper

- Modern Bathroom Faucet - Matte black bathroom faucet with superior corrosion & rust-resistant finish, brings a refreshed...
- Solid Brass Construction - This single handle faucet is constructed with solid lead free brass body and ceramic disc...
The SOKA Brass Bathroom Faucet is an elegant one-handle faucet.
Since it comes in seven different colors, there’s a good chance you’ll be able to match it with your RV’s interior.
The faucet is brass and has a classic residential look and feel.
If upgrading from a two-handle faucet, the six-inch cover will help hide the extra holes and provide a polished look in your RV bathroom.
It even comes with a pop-up strainer with an anti-clogging basket to help keep hair and other items from finding their way into your plumbing system.
Best Waterfall Style Option: Waterfall Bathroom Faucet

- Elegant and Unique Design: The BWE bathroom faucet features a stylish brushed gold finish with a waterfall spout design...
- Easy Installation: This faucet is designed for a 1-hole installation and comes with all necessary hardware.!!!No drain...
Waterfalls are mesmerizing, so why not have one in your RV?
This brushed nickel faucet is for single holes only and can provide your RV bathroom with an exquisite look, unlike the cookie-cutter bathrooms RV manufacturers create.
It’s 13 inches tall, and the spout reaches 4.7 inches.
You won’t have to worry about splashing water all over the place or making a mess.
Keep in Mind: Upgrade your bathroom with these RV Bathroom Accessories You’ll Actually Love!
Improve the Look and Usability of Your RV Bathroom Faucet
Simple things like upgrading your RV bathroom faucet can have a huge impact on the bathroom in your RV.
This is a great upgrade that you should consider whether you’re planning to sell your RV or own it for years.
Improving the look and functionality of your RV will make it easier for you to enjoy your RV and create a home-like environment for you to enjoy during your adventures.
Last update on 2024-04-25 / Affiliate links / Images from Amazon Product Advertising API