


Table of Contents Show
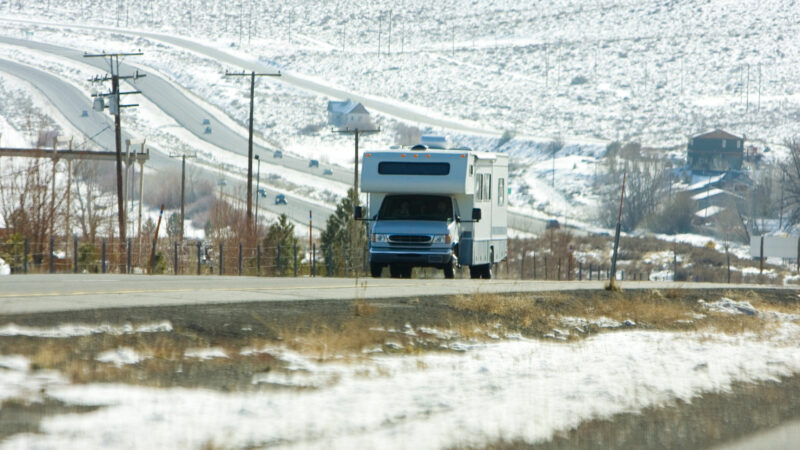
Almost every RVer has experienced this kind of situation. You’re driving through a construction zone with tons of debris on the road. After getting through the orange cones, you pull off the next exit to ensure no damage to your RV.
You notice a small hole where a rock or other debris bounced up and damaged the RV underbelly material. Thankfully, this is an easy fix, and you already have the tape to make the repair in your toolbox.
So you can head to your destination, where you’ll spend a few minutes making the necessary repairs.
Fixing or replacing your RV underbelly material may sound like a daunting task. If you have a 45-foot toy hauler, that’s a lot of underbelly! But it’s a DIY project that won’t take much time unless there’s a significant water leak.
Let’s look at how to make these repairs to your RV underbelly material so that when it happens to you, you can take care of it yourself!
What Is An RV Underbelly?
The enclosed space underneath an RV is the underbelly. It protects wires, pipes, and tanks.
In some models, the RV underbelly material is insulated and heated, protecting water lines from freezing and bursting. In addition, the underbelly keeps debris from collecting as you travel and prevents rodents from making a home in your RV.
What Are Different Types of RV Underbelly Material?
There are two main types of RV underbelly material: corrugated plastic and fabric. Some RVs will have one solid sheet of plastic, while others will have several sheets.
Repairing damage in one solid sheet is much more challenging because you can’t simply remove the one that needs replacing. You might even find an older RV with an underbelly of metal or wood.
What Causes RV Underbelly Damage?
Your RV underbelly protects one of the most vulnerable places of your RV. You don’t want a rock to damage the essential systems covered up by the underbelly on a travel day.
There are so many kinds of debris that can bounce and strike the RV’s underbelly. When this happens, the underbelly can tear or crack.
Also, you may have a water leak from a cracked tank or broken hose. The water will eventually seep into the RV’s underbelly. The worst enemy of an RV is moisture.
This is something you’ll want to repair immediately. Thankfully, fixing your RV underbelly is usually a simple task.
How to Replace Your RV Underbelly Material
Depending on the type of RV underbelly material, you’ll have to fix tears, leaks, and cracks differently.
Stores like RecPro, eTrailer, Amazon, and Walmart will carry the necessary supplies to fix the underbelly so you can go back to camping in no time.
Problem: Torn Underbelly
If your RV underbelly is plastic or a tarp-like material, then it’s likely you’ll find a tear at some point. Animals can claw at it, or debris from traveling will eventually rip a hole. However, this is one of the most straightforward repairs. Just tape it!
There’s specific underbelly tape for this purpose, an adhesive polyethylene material.
It’s durable and waterproof. Clean the area near the tear or hole and apply the tape. Secure it tightly. You’ll need no special tools or equipment.
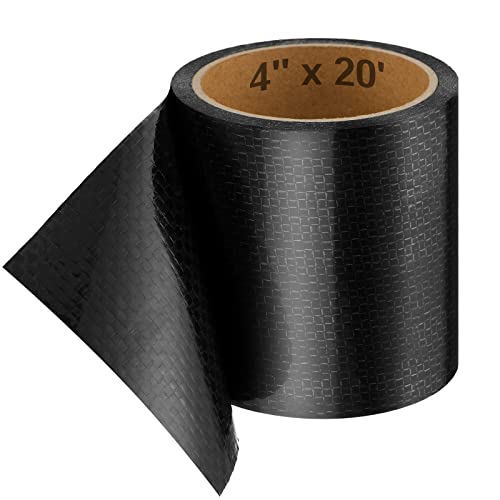
- What you will receive: the package includes 1 piece of RV underbelly material, which is approx. 20 ft in length, 4 inch...
- Good adhesiveness: the home wrap tape has good adhesiveness, suitable for repair the tears in the bottom of RVs and...
Problem: Leaking Underbelly
Probably the worst repair you’ll ever have to make in an RV is water damage. Sometimes you don’t catch it soon enough, and it ruins the entire underbelly. But if you’ve spotted a leak sooner than later, fixing the RV underbelly quickly will prevent mold and mildew from growing.
First, locate the leak. Take a knife and cut into the underbelly material in a few places so you can take a look around the underneath of the RV. If you can locate the leak without removing the entire underbelly, you’ll save time and money.
But if you have to remove the whole RV underbelly, it’s still a DIY project that won’t require hiring a mobile technician.
Once you locate the leak, remove the affected underbelly. Then remove all the wet insulation. You must get all the affected areas because mold will grow here.
If the entire bottom of your RV is wet, you’ll have to pull out all the insulation. Drying the underbelly is another critical step in preventing mold. Set up a Shop-Vac or fans to ensure the entire affected area dries. This may take a few hours or a few days.
Once the area dries, you need to replace the old insulation and the old RV underbelly. If you have extensive leaking, you might want to call a professional.
RVers can’t afford to play around with water damage. However, if you think you can tackle the repair yourself, you’ll save hundreds of dollars.
Keep in Mind: Do You Have Water Damage in Your RV? Then you need to Inspect These Places First
Problem: Broken Sheet
If your RV underbelly has sheets of corrugated plastic, instead of experiencing a tear like in the fabric underbelly material, you’ll find a broken sheet.
This is a bit more challenging than slapping on a piece of tape because you’ll need to replace a fractured sheet with a new one. You can buy corrugated plastic sheets from Amazon or a home improvement store. However, it’s still not a lengthy process.
First, figure out how to attach the RV underbelly material. Raise the RV on jacks and secure it before crawling underneath. Then remove the nails, screws, or fasteners. You’ll need tools like a hammer, screwdriver, or maybe even a crowbar.
Proceed with caution. You don’t want the RV underbelly falling on top of you, and you don’t want to lose the fasteners. After the old broken sheet is off, secure the new plastic sheet with nails, screws, or fasteners.

- Size: Standard 8" x 12" sign blank holders, 20mm thick corrugated plastic sign is durable, waterproof and reusable
- Corrugated fluted plastic sheet is sturdy extruded from polypropylene Lighter in weight than wood and solid pvc sheets

- 【Practical Kit and Various Size】 A kit includes an 8oz claw hammer and plenty of sizes of hardware nails, 1.6mm *...
- 【High-quality Nails】 JEGONFRI nail’s surface is galvanized, which can effectively prevent corrosion and meet your...
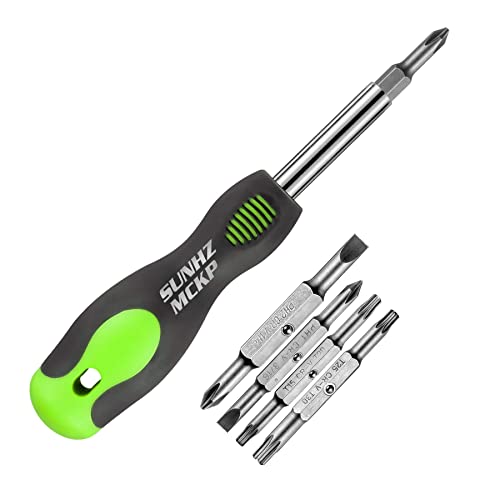
- ☞【ERGONOMIC DESIGN】The screwdriver set features an oversized handle design with a non-slip grip to reduce hand...
- ☞【MULTI-BIT SCREWDRIVER】Includes industrial strength heat treated bits : PH2 CR-V 1/4,PH1 CR-V 3/16,T15 CR-V...
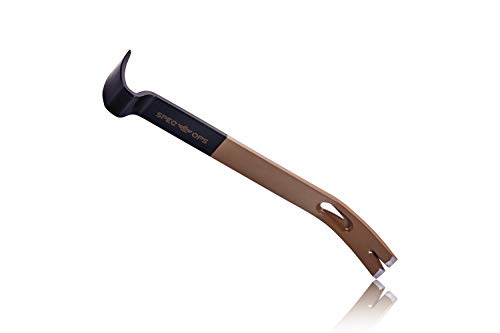
- 20% thicker, steel construction for maximum prying power
- Curved rocker end for sniper control
When to Call a Professional for Help
If you’re taking on a repair, ensure you always have help. You’ll want another set of hands holding the RV underbelly material while securing a piece of tape or attaching another plastic sheet. However, there are times when you’ll need to call a mobile technician.
If the water leak is extensive, you’ll want the professional experience of an RV repair person. If you miss even the smallest piece of wet insulation, the possibility of mold growing underneath your RV and into the systems, walls, and flooring is still there.
So if you open up the RV underbelly and notice ample water damage, pick up the phone.
Keep in Mind: It’s not uncommon for RVs to be recalled. But How Do You Find RV Recalls? Click the link to find out!
Upgrade Your RV Underbelly Material
It’s also possible to upgrade your RV underbelly material. You can replace a fabric underbelly with corrugated plastic sheets. This material is more durable.
If you don’t like the one-piece plastic sheet you have, you can replace it with several sheets so repairs are more manageable. If you have help and purchase the materials, upgrading your RV underbelly or making necessary repairs isn’t very time-consuming or challenging.
Have you ever needed to fix a tear, leak, or crack in your RV underbelly?
Last update on 2024-07-26 / Affiliate links / Images from Amazon Product Advertising API