


Table of Contents Show
It’s wonderful to have the space to store your RV at home when you’re not using it. It’s even better when you have power running to the RV, so you can comfortably do renovations, repairs, or general maintenance. But if your rig has a 50-amp RV plug, you need a 50-amp outlet at your home to power it fully.
Many homes don’t have any 50-amp outlets to power an RV. Typically homeowners add one after purchasing an RV that runs off of 50-amp service. Fortunately, if you are a handy DIYer with knowledge about electricity, you can install a 50-amp RV outlet in most homes.
But remember, any time you work with electricity, know how to safely disconnect the power before doing any work and become familiar with electrical terminology and tools. If you feel skeptical about working with electricity, don’t do it yourself. Hire a professional.
But if you want to tackle installing a 50-amp RV outlet at your home, read on, and we’ll explain step-by-step how to do it.
Did You Know? Traditional garage doors aren’t big enough for most RVs to fit through. Here’s how to choose the right garage door size for your RV →
Can You Connect Your RV to Your Home Without a 50 Amp RV Plug?
You can connect your RV to a home outlet without a 50-amp service, but it will limit what you can power in your rig. A typical home outlet has 15/20 amps, not even close to the power your rig needs to operate fully.
Many power-hungry appliances, such as a washer and dryer or AC unit, will not operate when connected to a 15/20 amp outlet. However, you could still power the lights, refrigerator, and other low-powered appliances.
You can get a 50 to 15/20-amp adapter for your RV for short-term use. Also, find an outdoor-rated extension cord with a heavy enough gauge to handle the amperage and is as short as possible. However, don’t use this for an extended period.
What Is the Difference Between 30 Amp & 50 Amp Plugs?
The basic difference between a 30-amp and 50-amp plug is what they can power. A 30-amp service works for RVs with microwaves or a single AC unit which requires less power. You’ll need a 50-amp service for large RVs with appliances like double AC units, a washer/dryer, or a dishwasher.
Additionally, 30-amp and 50-amp plugs look and work differently. A 30-amp plug has three pins: a 120V hot pin, a flat neutral pin, and a round ground pin. It can handle up to 3,600W.
A 50-amp plug has four pins: two 120V hot pins, a flat neutral pin, and a round ground pin. It can handle up to 12,000W.
Pro Tip: We have everything you need to know about RV power cords right here →
How Many Volts Does a 50 Amp Service RV Support?
Despite its dual hot pins, a 50-amp service supports 120V. The two hot pins are not combined to increase the voltage.
The two 120V hot pins provide separate 50-amp, 120-volt feeds to provide more wattage to operate larger appliances.
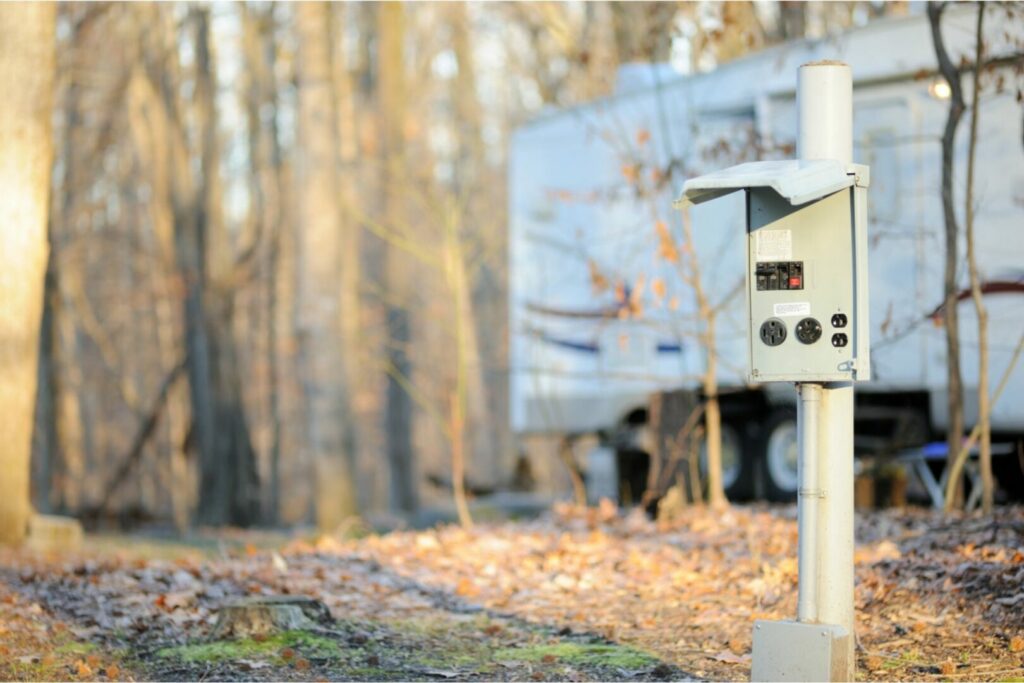
Pedestal or Wall Mounted Hookups?
You can set up a 50-amp service with a wall mount or with a receptacle mounted on an RV power pedestal like the ones in most RV parks.
We recommend a pedestal, as it provides more flexibility in putting it near where you want to park your RV. A wall-mounted receptacle works fine but may require more work in cutting into walls and figuring out how to mount it.
Remember, a 50-amp plug is heavy and puts a lot of stress on the outlet when plugging and unplugging it. It needs more reinforcement than a typical household outlet.
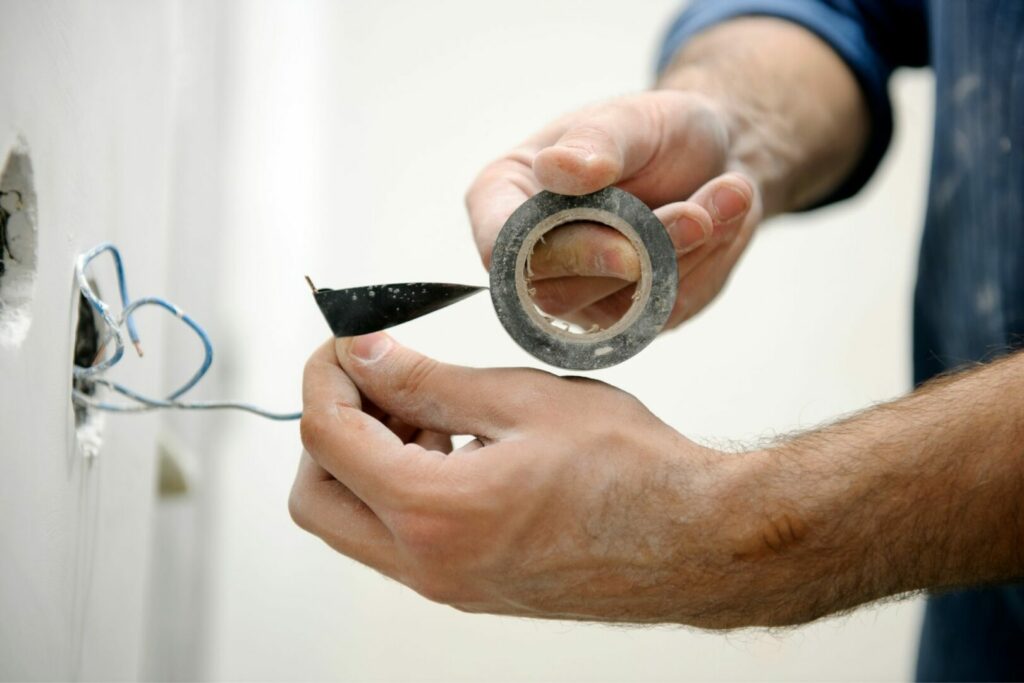
What Kind of Wire Do You Need for 50 Amp Service?
You will need a UF-rated, six-gauge, four-conductor copper wire for 50-amp service. The UF rating means the wire is suitable for outdoor applications.
The gauge of the wire rates its thickness. The lower the number, the thicker the wire (i.e., six-gauge is thicker than 10-gauge).
A six-gauge copper wire can handle the electricity of a 50-amp service. The wire core has four conductors. Typically, it will have a red and black wire for the “hot” 120V connections, a white neutral wire, and a green ground wire.
What You Need for the Job
Before we get started, you’ll need to get a few items to install a 50-amp plug for your RV.
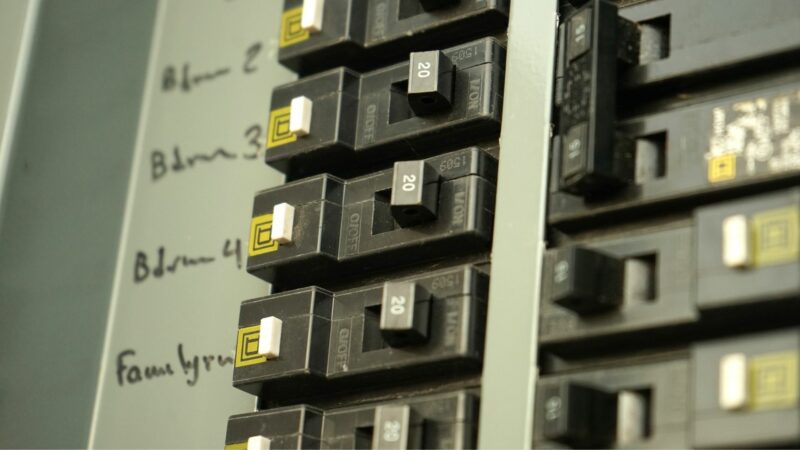
- First, you’ll need an empty space in the breaker box for a 50-amp, double-pole breaker.
- Second, find a new 50-amp double-pole breaker. This breaker has two handles and two terminals for the hot wires to connect. It is wider than a single-pole breaker.
- Ensure you have enough UF-rated six-gauge, four-conductor copper wire to run from the breaker box to the RV pedestal.
- You’ll want a weatherproof RV pedestal hook-up with a 50-amp (NEMA 14-50R) outlet. Or, if you prefer to do a wall mounting, you’ll need a separate weatherproof 50-amp (NEMA 14-50R) outlet.
- Next, get a one-inch diameter conduit for the wire to place anywhere you can bury it at least 24 inches deep, as required by code.
- Finally, you will need to get wire staples or clamps to secure the cables running to the pedestal and breaker box.
How to Install a 50 Amp RV Plug
Now that you have the necessary supplies, you can begin the installation. Take a look at the following steps to familiarize yourself with the process.
Shut Off the Main Breaker
Before doing any work involving the wiring, shut off all power to the breaker box. You should find a 100-amp or 200-amp main breaker that shuts down power to the entire unit. Note that it will not shut off the lines that feed the main breaker; these remain live or hot at all times.
If you don’t see a 100-amp or 200-amp main breaker in the box where you will install the new 50-amp breaker, you may have another breaker box somewhere that sends power to your installation box. Find it and shut off the main breaker. Put tape over it or a note so that no one inadvertently turns the power back on while you work.
The main breaker will still have power, so be careful. Use a voltmeter or a non-contact voltage tester (highly recommended) to check the other breakers to ensure no power runs to them.
Be extra careful and deliberate in everything that you do, so as to avoid touching those lines and getting shocked. If you don’t know how to safely check for live power, hire a professional.
Install the Pedestal
Mount the power pedestal in the chosen location. Ensure it has sturdy support. A 50-amp plug weighs a lot and puts a lot of stress on the power pedestal when inserting it and removing it. You need to solidly mount the pedestal to account for the weight.
Install a New Breaker in an Empty Spot
IMPORTANT: Always ensure you have turned off the power when using the breaker box and connecting the wires to it, the pedestal, or the outlet.
As we mentioned earlier, the breaker box needs to have a space to fit a 50-amp, double-pole breaker. Install the 50-amp while being careful not to touch the live wires connected to the main terminals.
Run the Wire Through the Conduit
Run the wire through the conduit before you start connecting them to the breaker and the pedestal. Per code, the wire must run through a protective tube anywhere above the ground down to 18 inches deep.
It can run without a conduit anywhere as long as you bury it at least 24 inches deep. However, it will still need a tube where it goes in and out of the ground.
Connect the Wires to the Breaker
In the breaker box, connect the green ground wire to the ground bus, then attach the white neutral wire to the neutral bus.
Connect the black and red hot wires last, which attach to the terminals on the 50-amp breaker. It doesn’t matter which hot wire connects to which terminal.
Connect the Wires to the Pedestal
After securing one end of the wires to the breaker, connect the other end to the pedestal. The terminals on the back of the 50-amp outlet should be labeled.
Connect the green ground wire to the terminal labeled green. Then, connect the white neutral wire to the terminal labeled white.
Finally, connect the red and black hot wires to the terminals labeled X and Y. It doesn’t matter which hot wire goes to which terminal. Just ensure that the green and white labels get connected to their respective terminals.
Switch on the Breaker & Test
Once you have connected the wiring correctly, you can test your new power pedestal. Turn on the main breaker, then turn on your new 50-amp breaker. Use a voltmeter or non-contact voltage tester to ensure you have power going to the outlet on the pedestal. Now you can plug in and enjoy.
Should You DIY or Hire a Professional for This Job?
If you are a handy DIYer familiar with electricity (you understand the terminology and the basics of working safely with electricity), you may not find this an overly complicated job.
However, we can’t stress enough that you must remain diligent when working with electricity. Be sure that the power is turned off whenever you work with terminals, breaker boxes, wires, or other elements that carry live electricity.
If you are not familiar with electricity or feel hesitant, hire a professional. We all want to save a buck, and many RVers do a lot of repairs and maintenance themselves, but safety is worth more than saving a few dollars.
Professional installation should run between about $300 and $1,200. The cost depends on the complexity of where and how you want the power pedestal located.

Will You Install a 50 Amp RV Plug?
Having a place to store your RV at home is extremely helpful in preparing it for the road. Supplying it with full power is even better.
When you have power to your RV, it certainly makes tasks easier and more comfortable. Running the AC for simple routine maintenance or cleaning makes the work much more tolerable.
And if you do any major renovations or repairs, it certainly helps to have power for the tools you need to use. Plus, plugging it in keeps the batteries topped up.
If you have a space to park your RV, why not have available power? You can do it yourself without too much work if you want. But even professional installation won’t cost you too much.
Power up and power on!