


Table of Contents Show
Knowing how to level a travel trailer is an essential skill every RV owner must possess. If not, you’ll have trouble staying comfortable and using some of your appliances during your trip. Trust us; precision matters. It can make for some long and frustrating trips.
Unfortunately, this can be a tricky and frustrating process. However, you can do it safely and easily with the right tools and techniques.
Today, we’ll walk you through how to level a travel trailer. You’ll be an expert before you know it!
Do You Need to Level a Travel Trailer?
Anytime you park or use your RV, you want it to be as level as possible. This helps ensure that the various appliances, especially propane ones, function correctly. An unlevel trailer could cause serious damage to these appliances.
Additionally, spending time in an unlevel travel trailer is incredibly uncomfortable. It can make moving around inside your rig difficult. Everything from lying in bed to walking from one side to the other will pose more of a challenge.
You want your camper as stable and secure as possible to avoid potential issues. So ensure you take the time to level it.
Is Leveling a Travel Trailer Hard?
Leveling a travel trailer can sometimes be challenging, especially for first-time RVers. You have so many things to remember and consider during the process.
Additionally, all campsites and parking spots are different. What worked at one spot likely won’t work at the next.
The more you can practice, the easier it becomes. After a handful of times, you’ll likely notice it getting easier. However, after a dozen trips, you’ll feel like a pro. If you need an excuse to book a campsite, now you have one.
Can You Level a Trailer By Yourself?
It is possible to level a trailer solo, but it’s typically not easy. We don’t recommend anyone new to RVing try leveling their trailer independently. You need plenty of experience maneuvering RVs and a few pieces of equipment to help you.
First of all, you must be comfortable maneuvering your RV without assistance. If the spot requires you to back into it, you must stay mindful of any objects in the area. A backup camera on your camper can make it much more manageable.
Additionally, using a set of Andersen Levelers under your tires and the LevelMatePRO can be incredibly helpful. You can check the levelness of your rig from your phone, place the Andersen Levelers, and then drive up on them until your rig is level side to side. Then set the emergency brake and lock the levelers into place.
- 🛻[MUST HAVE FOR CAMPERS OR FIFTH WHEEL]: Works great on trailers up to 30,000 lbs and with tires up to 32" diameter....
- 🛻[EASY TO USE]: Just drive on, decide how high you want it and place the chocks! You'll be ready to go dirt biking or...
- FUSS-FREE LEVELING: LevelMatePRO is an essential RV accessory that saves you time for leveling. It provides real-time...
- SIMPLE SETUP: Simply mount this device in your vehicle with the included screws. LevelMatePRO app compatible with iOS...
The most important thing is to take your time and not hurry. While it can feel exciting to get the party started, you have a higher chance of making a mistake if you rush. A checklist can help you avoid costly mistakes when leveling your rig.
What Do You Need to Level Your Travel Trailer?
The equipment and supplies you’ll need to level your travel trailer will vary based on the site. However, we buy into the philosophy that it’s better to have them and not need them than to need them and not have them. Let’s look at some items to make it easy to level your travel trailer.
Tire Chocks
Way back in 2017, we learned the importance of investing in quality chocks for our tires. Seriously, we got lucky. We could have destroyed our RV and injured ourselves or someone else.
You can watch our “Everything Went Wrong” video for the full version. However, long story short, we didn’t use wheel chocks, and our massive 42-foot fifth wheel started to roll. Using a set of $10 tire chocks would have avoided the issue.
You don’t want the wheels to move when leveling your RV. Tire chocks go in front and behind your wheels to prevent any movement. No matter how level a campsite appears, you should chock your wheels every time you unhitch your trailer.
Don’t try to save a few bucks and buy cheap plastic tire chocks. These tiny pieces of plastic won’t do much good against an RV that weighs thousands of pounds. Spend a few extra dollars and get a set of beefy rubber ones. They’ll take the abuse from your adventures and get the job done.
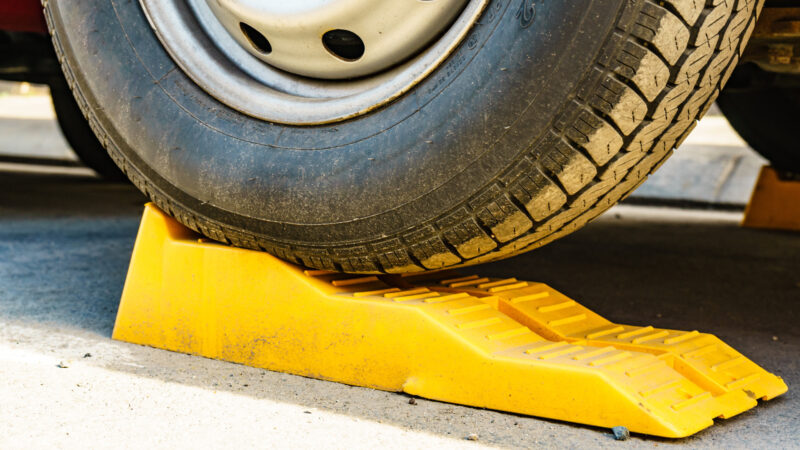
Leveling Blocks
Next, you’ll need leveling blocks. If one side of your trailer is lower than the other, you need something to raise the height on the lower side. Some owners use large pieces of wood, and others use Lego-like blocks.
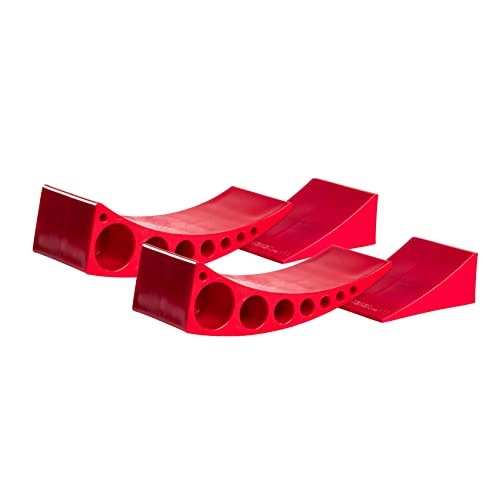
However, our favorite option is the Andersen Levelers we mentioned earlier. Stackable blocks help with leveling and can reduce the distance between your landing gear and the ground.
The shorter the distance, the more stable your camper will feel. You won’t feel the rocking and bouncing that annoys many RVers nearly as much.
- 🛻[MUST HAVE FOR CAMPERS OR FIFTH WHEEL]: Works great on trailers up to 30,000 lbs and with tires up to 32" diameter....
- 🛻[EASY TO USE]: Just drive on, decide how high you want it and place the chocks! You'll be ready to go dirt biking or...
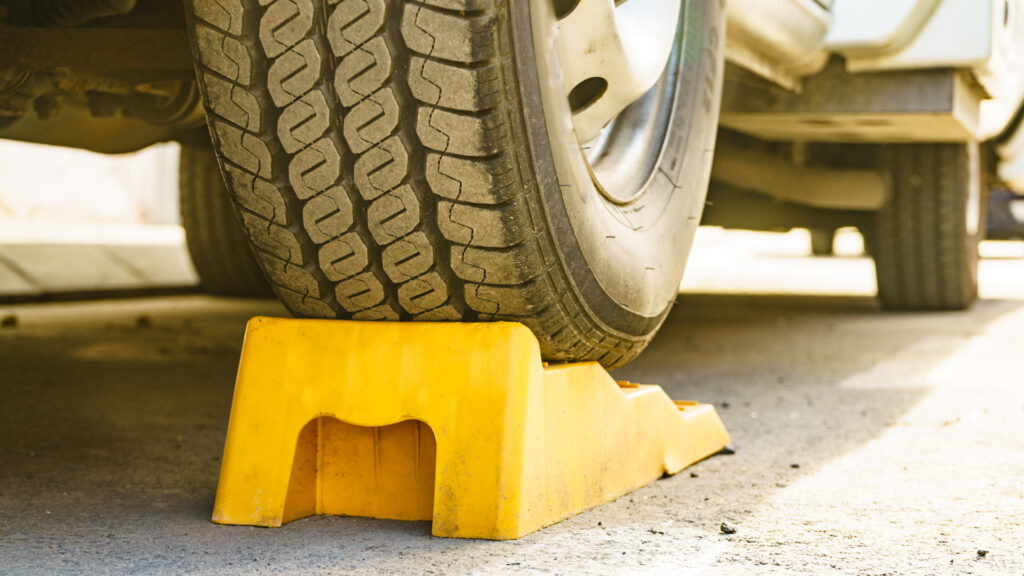
Tongue Jack Stand
Additionally, to level your travel trailer, it helps to give your tongue jack a wide and solid foundation. A tongue jack stand can maximize the footprint and ensure your jack stays in place. Additionally, it reduces how much you need to extend your tongue jack.
Make sure you purchase a jack stand compatible with the weight of your trailer. If not, you could put yourself and your trailer in danger.

- Supports the trailer tongue without the worry of sinking into the asphalt on hot days
- Eliminates the need to tote and store bulky wood blocks and weighs only 2 lbs.
Bubble Level
While some newer travel trailers have built-in leveling systems, most don’t. If your rig doesn’t, you’ll rely on a good old fashion bubble level. Get one that is at least three feet long to get the best results.
You can place the level on the bumper of your camper or the floor inside your rig. This can make it easier to see how you need to adjust the position of your rig to get it as level as possible.

- MULTIPLE ANGLES & MEASUREMENTS: 180 ˚ rotating vial
- ACCURACY: Level accuracy of 1 mm/M
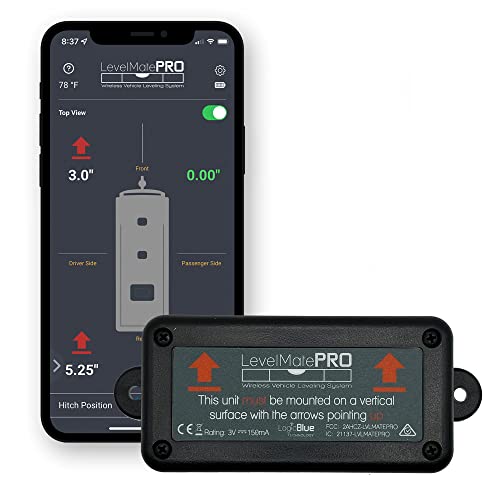
LevelMatePRO
The last tool you’ll need for the job is a LevelMatePRO. Whether or not you have an auto-leveling system, this is a handy tool.
You mount the device in your camper and calibrate it so it knows what level looks like for your rig. It measures the levelness of your trailer and sends the information through Bluetooth to your phone.
Whether boondocking on public lands or backing into a campsite, you want to find the most level spot possible. The LevelMatePRO allows you to do this efficiently and accurately. You don’t even have to get out of the driver’s seat.
Keep in Mind: Can you drive an RV through a drive-thru? This Woman attempted (and failed) to Drive her Travel Trailer Through KFC!
How to You Level a Travel Trailer
While the specific process for leveling a camper varies based on the rig, several common steps exist. Let’s look at the basic process required to level a travel trailer properly.
Find a Level Spot
First, find a level spot to park. Whether in a campground, RV park, or public lands, you want to find the most level spot possible. Unfortunately, some campsites are more level than others. Some spots may require placing blocks under your tires to get your rig level.
Additionally, it’s also important to understand that not every site will work with every rig. Generally, the larger your rig, the fewer campsites you can access. Do as much research as possible to ensure your rig is compatible with the campsite before making a reservation.
Level Side to Side
The first thing you need to do is level your rig side to side. Even if you have an auto-leveling system, you want to get it as level as possible before initiating it.
Whether you use plastic leveling blocks, Andersen Levelers, or pieces of wood under your tires is up to you.
But most importantly, check how level you are from side to side before unhitching. If not, you must reconnect to your tow vehicle to change the position. As we said, the LevelMatePRO makes it easy to confirm your rig is level.
Chock Your Tires
Once you’ve got your camper level, and in a spot you like, you must chock your tires. It’s a good idea to purchase two sets of chocks for your tires and secure both sides. It’s better to be safe than sorry.
Unhitch Your Travel Trailer
After you’ve chocked your tires, you can start the unhitching process for your travel trailer. The required steps will vary depending on the hitch you use. However, it can take some time to learn.
We’ve learned that if something isn’t working, there’s a reason why. If everything works as it should, you shouldn’t have to force anything into place. This is why it’s important to maintain all of your equipment so it functions properly.
Many travel trailer owners experience binding between the hitch ball and the coupler, making removing it difficult. If you experience this, adjust the height of the trailer to help release tension between the two.
Additionally, always ensure you go in reverse as your last move when parking. This helps prevent any pressure between the coupler and the hitch ball.
Keep in Mind: Protect your RV jacks with The Best RV Jack Pads For Your Camper
Level Front to Back
Once you’ve disconnected your travel trailer from your tow vehicle, it’s time to level it front to back. How much you need to raise and lower the tongue of your travel trailer will depend on the site.
You’ll likely need to retract your tongue jack if the site slopes downward. Be careful to avoid using too many leveling blocks or a tongue jack that is too tall. If you do, you might not be able to retract your tongue jack enough to get your rig level from front to back.
On the other hand, if your site is on an incline, you may need to raise the front of your rig. A typical tongue jack only provides around 18 inches of lift.
While this may work for most campsites, it’s not always going to be enough. This is where you want to use leveling blocks or a tongue jack stand to add several more inches.
Always Level Your Rig Properly
You must level your rig properly every time. Doing so makes it easier to enjoy your RV and make memories with your loved ones. Trust us, learning to level your rig will save you time, money, and a headache or two.
Learning to level your rig properly will take some time, but you’ll be an expert in no time if you stick to it.
Do you struggle to level your travel trailer?
Last update on 2024-04-25 / Affiliate links / Images from Amazon Product Advertising API